

- Introduction:
- Chapter 1: Understanding the Power of Canva
- Chapter 2: Exploring Canva Integrations
- Chapter 3: Integrating Canva with Google Workspace
- Chapter 4: Amplifying Social Media Presence with Canva and Buffer
- Chapter 5: Collaborative Editing with Canva and Dropbox
- Chapter 6: Streamlining Email Marketing with Canva and Mailchimp
- Chapter 7: Boosting Productivity with Canva and Trello
- Conclusion:
Introduction:
Canva, a popular online design tool, has revolutionized the way individuals and businesses create visually stunning content. However, to truly maximize its potential, integrating Canva with other tools can enhance your workflow, allowing for seamless collaboration and a broader spectrum of creative possibilities.
Chapter 1: Understanding the Power of Canva
Before delving into integration, it’s crucial to grasp the capabilities of Canva. This user-friendly design platform offers a plethora of templates, graphics, and editing features. From social media posts to presentations, It empowers users to bring their ideas to life. Familiarize yourself with the basics, explore the template library, and experiment with design elements to get a feel for its versatility.
Chapter 2: Exploring Canva Integrations
Canva’s ecosystem extends beyond its standalone features. Integrating it with other tools enhances its functionality and streamlines your creative process. Explore the diverse range of integrations available, including those with popular platforms like Google Drive, Dropbox, and more. These integrations facilitate seamless file sharing, ensuring that your designs are easily accessible and editable across multiple platforms.
Chapter 3: Integrating Canva with Google Workspace
For those immersed in the Google Workspace environment, integrating Canva can significantly boost productivity.
How to integrate Canva with Google Workspace?
Follow these simple steps to seamlessly integrate your creativity:
- Download Your Design: Once your masterpiece is complete on Canva, download it in a compatible format like PNG or JPEG.
- Access Google Docs, Slides, or Sheets: Open the document, presentation, or spreadsheet where you want to incorporate your design.
- Insert Image: In your Google file, click “Insert” and select “Image.” Choose the option to upload from your device.
- Upload Design: Locate and upload your downloaded design. Adjust size and placement as needed.
- Perfect Integration: Your design is now flawlessly integrated into your Google Docs, Slides, or Sheets. Boost your productivity and creativity effortlessly!
This integration ensures a smooth transition between your design work and your collaborative projects within Google Workspace, eliminating the need for cumbersome file transfers.
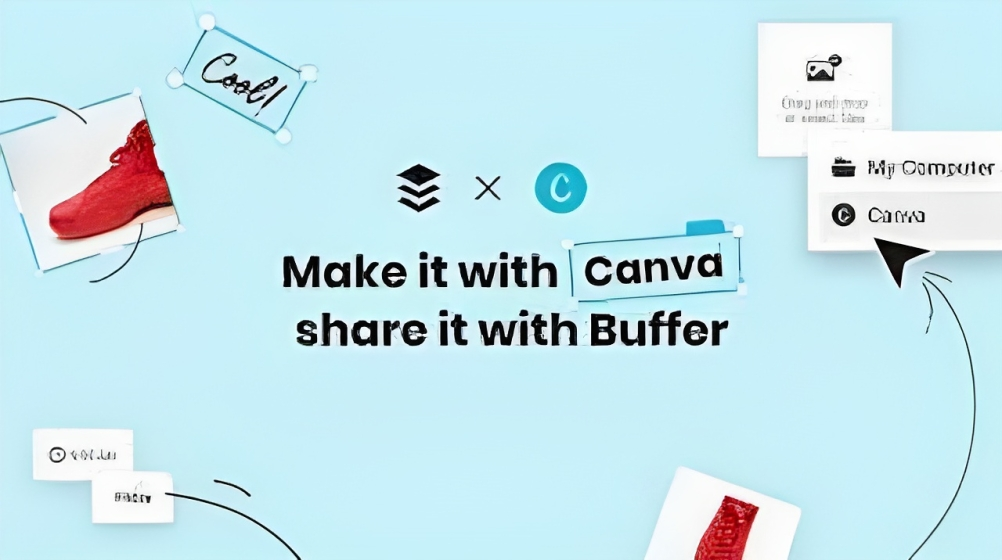
Chapter 4: Amplifying Social Media Presence with Canva and Buffer
Social media is a powerhouse for content distribution, and combining Canva with Buffer can supercharge your online presence.
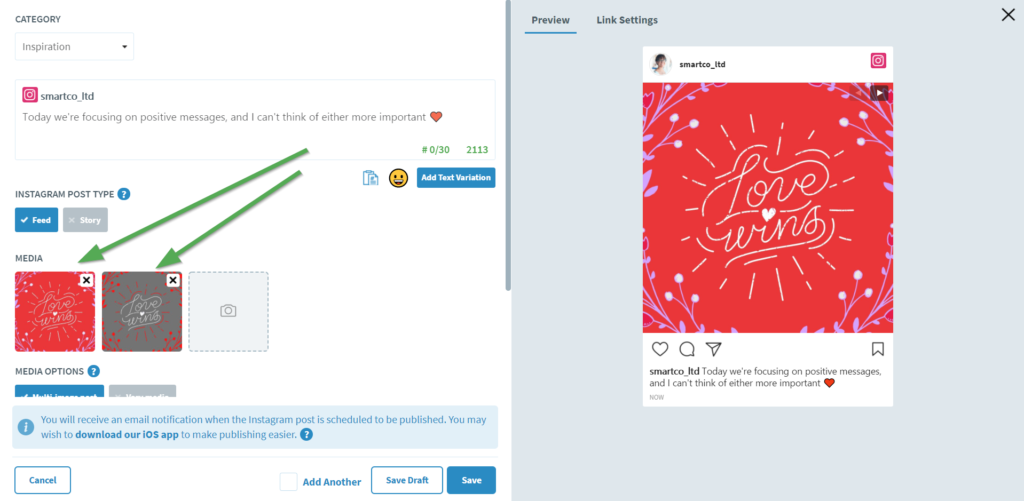
How to integrate Canva with Buffer to schedule and automate your social media posts?
Integration with Buffer can be a game-changer, allowing you to schedule and automate visually stunning posts.
- Create a Account: Start by signing up on Canva and design eye-catching visuals for your social media.
- Connect Canva to Buffer: Go to ‘Publish’ and select ‘Buffer.’ Connect your Buffer account to seamlessly link the two platforms.
- Design Your Post: Craft your post using its intuitive design tools, ensuring it aligns with your brand aesthetic.
- Schedule with Buffer: Once your design is ready, schedule your post directly from Canva to Buffer. Choose posting times for maximum engagement.
- Review and Edit: Head to Buffer to review your scheduled posts. Make any necessary edits or adjustments to optimize content.
- Analyze Performance: After posting, leverage Buffer’s analytics to measure engagement and refine your strategy for future content.
This synergy allows you to maintain a consistent posting schedule while leveraging design prowess to create eye-catching visuals that resonate with your audience.
Chapter 5: Collaborative Editing with Canva and Dropbox
Efficient collaboration is the key to successful projects, and integrating Canva with Dropbox fosters a collaborative design environment. Learn
How to sync your Canva designs with Dropbox, enabling real-time updates and easy file sharing among team members?
Follow these simple steps:
- Export Your Design: After creating your masterpiece on Canva, export it in the desired format (PDF, PNG, or JPG).
- Access Dropbox: Open your Dropbox account and navigate to the folder where you want to store your designs.
- Drag and Drop: Simply drag your exported file into the Dropbox folder. Dropbox will automatically upload and sync the file.
- Share the Magic Link: Generate a shareable link in Dropbox, allowing team members to access and collaborate on the updated design in real time.
This integration ensures that everyone involved in a project has access to the latest design iterations, promoting a streamlined and collaborative workflow.
Chapter 6: Streamlining Email Marketing with Canva and Mailchimp
Email marketing remains a potent tool for reaching your audience, and integrating Canva with Mailchimp enhances the visual appeal of your campaigns.
How to import Canva designs into Mailchimp?
- Follow these simple steps for a hassle-free import.
- First, export your design as a high-resolution image.
- Next, log in to your Mailchimp account and create a new campaign.
- Choose the email type and recipient list.
- In the content section, click on the design block, then select “Insert Image.”
- Upload your image, adjust settings, and voilà!
Your stunning design is seamlessly integrated into your Mailchimp campaign. Save time, maintain design integrity, and captivate your audience effortlessly.
Chapter 7: Boosting Productivity with Canva and Trello
For project management enthusiasts, integrating Canva with Trello can elevate your team’s efficiency.
How to embed designs directly into Trello boards?
Elevate project collaboration with this seamless integration in just a few steps:
- Design: Create your masterpiece, ensuring it’s the perfect visual representation of your project.
- Generate Embed Code: Once satisfied, click on the “Share” button. Select “Embed” and customize settings to suit your preferences.
- Copy Code: It will generate an embed code. Copy it to your clipboard.
- Access Trello Card: Open the Trello card where you want to embed the design.
- Attach Embed Code: Paste the embed code into the Trello card’s description or comments section.
This integration ensures that everyone on your team stays on the same page, fostering a cohesive and organized workflow.
Conclusion:
As the digital landscape continues to evolve, integrating Canva with other tools emerges as a strategic move to enhance creativity, collaboration, and overall efficiency. Whether you’re a solo creator or part of a team, unlocking its full potential through seamless integrations opens up a world of possibilities for visually compelling content creation. Embrace the power of synergy and witness your creative endeavors reach new heights.